Brief Content
This guide provides step-by-step instructions for replacing worn or damaged refrigerator door seals , also called door gaskets . It explains why the flexible rubber gasket is crucial for efficiency, covering air leaks and temperature control.
Advice includes safely removing old seals, cleaning surfaces, aligning and adhering new replacement door seals , and ensuring a snug, wrinkle-free fit. Checking for drafts and dollar-bill testing methods are also detailed to guarantee your appliance is resealed properly.
Whether your freezer door is not sealing properly or you simply want to learn how to install high quality universal refrigerator door gaskets , this reference has practical tips for this simple repair project. Follow the recommendations and breathe new life into an aging or inefficient refrigerator.
Is your refrigerator door seal worn out or damaged? Don't worry, replacing it is easier than you might think. A faulty door seal can lead to air leaks, causing your refrigerator to work harder and increasing your energy bills. In this article, we will guide you through the simple steps to remove and replace your refrigerator door seal, ensuring a tight and efficient seal.
Step 1: First, unplug your refrigerator to ensure your safety. This will also prevent any damage to the electrical components of your appliance. Make sure to have a new door seal ready before starting the process.
Step 2: Next, locate the screws that secure the door seal to the refrigerator door. These screws are usually hidden beneath a plastic cover or adhesive strip. Carefully remove the cover or strip to access the screws.
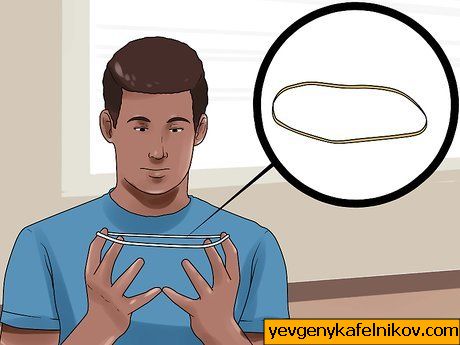
Step 3: Using a screwdriver, carefully unscrew and remove the old door seal. Take note of how the seal is attached to the door, as this will be helpful when installing the new one. Clean the area where the old seal was attached, ensuring it is free from any debris or residue.
Step 4: Now, it's time to install the new door seal. Starting from one corner, align the seal with the edge of the refrigerator door. Press firmly to secure it in place. Work your way around the door, ensuring the seal is evenly attached. Replace the screws and cover or strip to hold the seal in place.
Step 5: Finally, plug your refrigerator back in and check for any air leaks. Close the door and run your hand along the seal to ensure it is properly attached and creating a tight seal. If you feel any drafts or gaps, readjust the seal as needed.
By following these easy steps, you can remove and replace your refrigerator door seal in no time. This simple maintenance task will not only save you money on energy bills but also extend the lifespan of your refrigerator. Remember to consult your appliance's manual or contact a professional if you encounter any difficulties during the process.
Understanding Refrigerator Door Seals
The refrigerator door seal, also known as a gasket, is an essential component of your refrigerator that helps to maintain the internal temperature and keep the cold air inside. It is made of a flexible rubber material that creates an airtight seal when the door is closed.
The door seal prevents warm air from entering the refrigerator and cold air from escaping, ensuring that your food stays fresh and your energy bills stay low. Over time, the door seal can become worn or damaged, causing it to lose its effectiveness. This can lead to temperature fluctuations inside the refrigerator and increased energy consumption.
It is important to regularly inspect and maintain your refrigerator door seal to ensure that it is in good condition. Check for any signs of wear or damage, such as cracks, tears, or gaps. If you notice any issues, it may be time to replace the door seal.
Replacing the refrigerator door seal is a relatively simple process that can be done with a few basic tools. First, you will need to purchase a replacement seal that is compatible with your refrigerator make and model. It is important to choose a high-quality seal to ensure a proper fit and optimal performance.
To remove the old door seal, start by carefully peeling it away from the door. Use a putty knife or a similar tool to help loosen any adhesive or stubborn parts. Once the old seal is removed, clean the surface of the door to remove any residue or debris.
Next, position the new door seal on the door and press it firmly into place. Make sure that the seal is aligned properly and that there are no gaps or wrinkles. Use a hairdryer or a heat gun to warm the seal, which will help it conform to the shape of the door and create a tight seal.
Finally, allow the seal to cool and set for a few hours before closing the refrigerator door. This will ensure that the adhesive bonds properly and that the seal is securely in place.
By understanding the importance of refrigerator door seals and following these easy steps to remove and replace them, you can help to maintain the efficiency and performance of your refrigerator for years to come.
What does the door seal do?
The door seal, also known as a gasket, is an essential component of your refrigerator. It is located around the perimeter of the refrigerator door and serves several important functions.
1. Maintaining temperature: The primary function of the door seal is to create an airtight seal when the door is closed. This prevents warm air from entering the refrigerator and cold air from escaping, helping to maintain the desired temperature inside the fridge. Without a properly functioning door seal, your refrigerator may have to work harder to stay cold, leading to increased energy consumption and higher electricity bills.
2. Preventing condensation: The door seal also helps to prevent condensation from forming inside the refrigerator. When warm air enters the fridge, it can come into contact with the cold surfaces and cause moisture to form. This moisture can lead to the growth of mold and mildew, which can contaminate your food and affect its quality. A good door seal helps to keep the interior of your refrigerator dry and free from condensation.
3. Protecting against odors: Another important function of the door seal is to keep odors from escaping or entering the refrigerator. If the seal is damaged or worn out, it may allow odors from strong-smelling foods to permeate the fridge, affecting the taste and smell of other items. Additionally, an intact door seal prevents odors from outside the refrigerator, such as those from cleaning chemicals or spoiled food, from entering and contaminating your stored items.
4. Extending the lifespan of your refrigerator: By maintaining the proper temperature, preventing condensation, and protecting against odors, a well-functioning door seal can help extend the lifespan of your refrigerator. When the seal is working correctly, the fridge doesn't have to work as hard to stay cool, reducing wear and tear on the compressor and other components. This can result in fewer breakdowns and repairs, saving you money in the long run.
Overall, the door seal is a crucial part of your refrigerator that plays a significant role in its performance and efficiency. Regularly inspecting and replacing a worn-out seal can help ensure that your fridge continues to function optimally and keeps your food fresh for longer.
How do I know when to replace the seal?
There are a few signs that indicate it's time to replace the seal on your refrigerator door. One of the most obvious signs is if you notice cold air escaping from the refrigerator, causing it to work harder and potentially increasing energy costs. Another sign is if you find moisture or condensation on the outside of the refrigerator door, as this indicates a faulty seal that is allowing warm air to enter. Additionally, if you notice that your food is spoiling more quickly than usual or that certain areas of the refrigerator are not as cold as others, it could be a sign that the seal is no longer working effectively.
It's also important to regularly inspect the seal for any visible signs of wear and tear, such as cracks, tears, or gaps. If you notice any of these issues, it's a good idea to replace the seal as soon as possible to ensure that your refrigerator is operating efficiently.
What do I need to replace the seal?
To replace the seal on your refrigerator door, you will need the following tools and materials:
- A new refrigerator door seal
- A screwdriver
- A putty knife or scraper
- A hairdryer or heat gun
- A measuring tape or ruler
- A clean cloth or sponge
Before starting the replacement process, make sure you have these items on hand to ensure a smooth and successful seal replacement.
Taking Off the Old Seal
To begin removing the old seal from your refrigerator door, first make sure the refrigerator is unplugged from the power source. This is important for your safety.
Next, locate the screws that secure the seal to the door. These screws are usually located on the inside edge of the door or around the perimeter of the seal. Use a screwdriver to remove these screws and set them aside in a safe place.
Once the screws are removed, carefully peel back the old seal from the door. Start at one corner and gently pull the seal away from the door, working your way around the entire perimeter. Be cautious not to damage the seal or any other parts of the refrigerator during this process.
If the seal is stuck or difficult to remove, you can use a hairdryer to soften the adhesive. Use the hairdryer on a low heat setting and apply gentle heat to the seal as you continue to peel it away from the door.
Once the old seal is completely removed, inspect the door and surrounding area for any remaining adhesive or residue. Use a mild detergent and warm water to clean off any leftover residue, and allow the door to dry completely before proceeding.
With the old seal removed and the door clean and dry, you are now ready to install the new seal. Follow the next steps to learn how to properly replace the refrigerator door seal.
How do you remove a refrigerator seal?
Removing a refrigerator seal is a relatively simple process that can be done in a few easy steps:
- Unplug the refrigerator: Before starting any work, it is important to unplug the refrigerator from the power source to ensure safety.
- Open the refrigerator door: Gently open the refrigerator door and locate the seal that needs to be removed.
- Inspect the seal: Take a close look at the seal to identify any screws or clips that may be holding it in place. These screws or clips may vary depending on the refrigerator model.
- Remove the screws or clips: If there are screws or clips securing the seal, use a screwdriver or pliers to carefully remove them.
- Peel off the seal: Once the screws or clips are removed, gently peel off the seal from the refrigerator door. Start from one corner and slowly work your way around the door.
- Clean the door: After removing the seal, use a mild detergent and warm water to clean the area where the seal was attached. This will help remove any residue or dirt.
Please note: If the seal is stuck or difficult to remove, it may be helpful to use a hairdryer to soften the seal and make it easier to peel off.
Once the old seal is removed, you can proceed with replacing it with a new one. Make sure to align the new seal properly and secure it in place according to the manufacturer's instructions.
What's the easiest way to pull it off?
Removing the refrigerator door seal may seem like a daunting task, but with the right tools and technique, it can be a breeze. Here's the easiest way to pull it off:
- First, make sure the refrigerator is turned off and unplugged to avoid any accidents.
- Locate the screws or clips that hold the door seal in place. These are usually located on the inside of the refrigerator door.
- Use a screwdriver or a pry tool to carefully remove the screws or clips. Be gentle to avoid damaging the door seal or the refrigerator.
- Once the screws or clips are removed, gently pull the old door seal away from the refrigerator door. Take your time and be patient, as it may be stuck in some places.
- Inspect the door seal for any signs of damage or wear. If it is damaged, it's best to replace it with a new one.
- If you're replacing the door seal, align the new seal with the refrigerator door and press it firmly into place. Make sure it is evenly attached and there are no gaps.
- If necessary, use a hairdryer to heat the door seal slightly. This will make it more pliable and easier to fit onto the refrigerator door.
- Finally, reattach the screws or clips to secure the new door seal in place.
By following these easy steps, you'll be able to remove and replace your refrigerator door seal without any hassle. Remember to consult the manufacturer's instructions for your specific refrigerator model if you encounter any difficulties.
Putting On the New Seal
Once you have removed the old seal from your refrigerator door, it's time to put on the new one. Follow these steps to ensure a proper installation:
- Start by cleaning the area where the seal will be attached. Use a mild detergent and warm water to remove any dirt or debris.
- Inspect the new seal to make sure it is the correct size and shape for your refrigerator door. If it needs to be trimmed, use a sharp pair of scissors to carefully cut it to the appropriate length.
- Begin attaching the seal at one corner of the door. Press firmly to ensure a secure bond.
- Continue attaching the seal along the top edge of the door, working your way towards the opposite corner.
- Once the top edge is attached, move on to the sides and bottom of the door, pressing the seal firmly into place as you go.
- Make sure the seal is evenly aligned along the entire perimeter of the door. Adjust as necessary.
- Use a hairdryer set on low heat to gently warm the seal. This will help it conform to the shape of the door and create a tight seal.
- Allow the seal to cool and set for at least 24 hours before closing the refrigerator door.
Following these steps will ensure that your new refrigerator door seal is installed correctly, providing an airtight seal to keep your food fresh and your energy bills low.
How do you put a new seal back on a refrigerator?
Replacing a refrigerator door seal is a relatively simple process that can be done in just a few steps. Here is a step-by-step guide on how to put a new seal back on a refrigerator:
Step 1: Begin by removing the old seal from the refrigerator door. Gently peel back the old seal from one corner, being careful not to damage the door or the seal itself. Continue peeling the seal off until it is completely removed from the door.
Step 2: Clean the area where the old seal was attached to the door. Use a mild detergent and warm water to remove any residue or dirt that may be left behind. Dry the area thoroughly before proceeding to the next step.
Step 3: Take the new seal and align it with the door. Make sure that the seal is positioned correctly and that it lines up with the edges of the door. The seal should fit snugly against the door without any gaps.
Step 4: Start attaching the new seal to the door. Begin at one corner and press the seal firmly onto the door, making sure it adheres properly. Continue working your way around the door, pressing the seal down as you go. Use your fingers or a rubber mallet to ensure a secure attachment.
Step 5: Once the new seal is attached to the door, check for any gaps or areas where the seal may not be properly sealed. If necessary, adjust the position of the seal or apply additional pressure to ensure a tight seal.
Step 6: Finally, test the seal by closing the refrigerator door. Make sure that the door closes properly and that there is no air leakage. If the door does not close properly or if there is air leakage, you may need to readjust the seal or consider replacing it.
Following these steps will help you put a new seal back on your refrigerator door and ensure a proper and secure seal. A well-sealed refrigerator door is essential for maintaining the temperature and energy efficiency of your refrigerator.
How do you align a refrigerator seal?
Aligning a refrigerator seal is an important step in the process of removing and replacing it. Here are the steps to align a refrigerator seal:
- Start by removing the old seal from the refrigerator door. This can usually be done by pulling it away from the door.
- Clean the area where the seal was attached using warm soapy water. This will help ensure a clean surface for the new seal to adhere to.
- Take the new seal and align it with the edges of the refrigerator door. Make sure it is centered and level.
- Once the seal is properly aligned, begin attaching it to the door. Start at one corner and work your way around, pressing the seal firmly against the door as you go.
- Use a heat gun or hairdryer on a low setting to gently warm the seal. This will help it conform to the shape of the door and create a tight seal.
- Continue pressing the seal against the door as you heat it, ensuring that it adheres properly.
- Once the seal is fully attached, close the refrigerator door and check for any gaps or areas where the seal may not be properly aligned.
- If necessary, adjust the position of the seal by gently pulling it away from the door and repositioning it.
- Finally, test the seal by closing the door and checking for any air leaks. If the seal is properly aligned, it should create a tight seal and prevent any air from escaping.
By following these steps, you can easily align a refrigerator seal and ensure that your refrigerator is working efficiently.
How to get a new seal to fit snugly?
When replacing your refrigerator door seal, it's important to ensure that the new seal fits snugly to maintain the proper temperature inside the fridge. Here are some easy steps to help you achieve a tight fit:
- Measure accurately: Before purchasing a new seal, measure the dimensions of your refrigerator door carefully. This will ensure that you get the right size seal that fits perfectly.
- Clean the area: Make sure to clean the area where the seal will be placed. Remove any dirt, debris, or residue that may prevent the new seal from adhering properly.
- Soften the seal: To make the new seal more pliable, soak it in warm water for a few minutes. This will allow you to shape it easily and ensure a snug fit.
- Start from the top: Begin installing the new seal from the top of the door. Align it properly and press firmly to ensure a secure attachment.
- Work your way around: Slowly work your way around the sides and bottom of the door, pressing the seal firmly into place. Take extra care to ensure that there are no gaps or wrinkles.
- Check the fit: After installing the new seal, close the refrigerator door and check for any gaps or leaks. If necessary, adjust the seal to ensure a tight fit and proper sealing.
Following these steps will help you get a new seal that fits snugly and keeps your refrigerator working efficiently. Remember to refer to the manufacturer's instructions for specific guidance on installing the seal for your particular refrigerator model.
Checking the New Seal
Once you have installed the new refrigerator door seal, it is important to check if it is properly aligned and functioning correctly. Follow these steps to ensure that the seal is installed correctly:
- Close the refrigerator door: Make sure that the door is closed tightly and that there are no gaps or spaces between the door and the refrigerator.
- Check for any leaks: Run your hand along the edges of the seal to feel for any air leaks. If you feel any drafts or air escaping, it may indicate that the seal is not properly installed.
- Test the seal: To test the seal, place a dollar bill between the seal and the refrigerator door. Close the door and try to pull out the dollar bill. If you can easily remove the bill without any resistance, it means that the seal is not creating a tight seal and needs to be adjusted.
- Inspect the seal for any damage: Carefully examine the seal for any tears, cracks, or wear. If you notice any damage, it may affect the seal's performance and should be replaced.
If you find any issues with the new seal, you may need to readjust or replace it. It is essential to have a properly functioning seal to maintain the efficiency and temperature control of your refrigerator.
How do you test a new refrigerator seal?
Once you have installed a new refrigerator seal, it is important to test its effectiveness to ensure that it is properly sealing your refrigerator door. Here are a few simple steps you can follow to test your new refrigerator seal:
- Close the refrigerator door and make sure it is fully sealed.
- Place a dollar bill or a piece of paper between the seal and the refrigerator frame.
- Try to pull the dollar bill or paper out. If it slides out easily or if you feel any resistance, it means that the seal is not properly sealing the door.
- Repeat the test in different areas of the door to make sure the seal is effective all around.
- If the seal fails the test, you may need to readjust it or replace it with a new one.
Remember, a properly functioning refrigerator seal is important for maintaining the energy efficiency of your refrigerator and keeping your food fresh and safe. Regularly testing and replacing the seal if necessary is a simple step you can take to ensure the optimal performance of your refrigerator.
What is the best way to keep door seal in good condition?
The door seal of your refrigerator plays a crucial role in maintaining its energy efficiency and keeping your food fresh. To ensure that your door seal remains in good condition, there are a few simple steps you can follow:
1. Keep it clean: Regularly clean the door seal using a mild detergent and warm water. This will help remove any dirt or debris that may accumulate on the seal, preventing it from sealing properly.
2. Avoid using sharp objects: Be careful not to use sharp objects, such as knives or scissors, to remove any stuck-on food or debris from the door seal. This can damage the seal and compromise its effectiveness.
3. Check for damage: Regularly inspect the door seal for any signs of damage, such as cracks, tears, or gaps. If you notice any issues, it's important to replace the seal as soon as possible to prevent air leaks.
4. Test the seal: Periodically test the seal by closing the refrigerator door on a piece of paper. If you can easily pull the paper out without resistance, it may be a sign that the seal is not properly sealing and needs to be replaced.
5. Avoid excessive force: When closing the refrigerator door, avoid slamming it or applying excessive force. This can strain the door seal and cause it to wear out more quickly.
6. Maintain proper temperature: Keeping your refrigerator at the recommended temperature can help prolong the life of the door seal. Check the manufacturer's guidelines for the ideal temperature setting.
By following these simple steps, you can keep your refrigerator door seal in good condition, ensuring optimal energy efficiency and food preservation.